Finding the Best Memory Replacement.

Understanding RAM and Its Importance
Every component in your computer plays a vital role in its performance, and RAM (Random Access Memory) is no exception. While many believe that “more RAM is better,” that’s not always the case. Choosing the right RAM for your laptop or desktop requires understanding compatibility, specifications, and upgrade options.
How to Upgrade Laptop Memory
1. Identify Your Current RAM Type
Laptops and desktops use different memory types, such as DRAM, DIMM, SO-DIMM, DDR, DDR2, DDR3, and DDR4. The specific type your system supports depends on the motherboard and manufacturer. If your laptop’s manual doesn’t specify the correct memory type, visit the manufacturer’s website and search using the model number.
Alternatively, online tools from brands like Kingston and Crucial can help identify the exact RAM type compatible with your laptop. Simply enter your laptop’s make and model, and the tool will generate a list of supported upgrades.
2. Signs That Your RAM Needs Replacement or Upgrade
If your laptop experiences frequent crashes, slow performance, or error messages at startup, a failing or insufficient memory module could be the cause. Insufficient RAM can lead to performance bottlenecks, making multitasking and demanding applications sluggish.
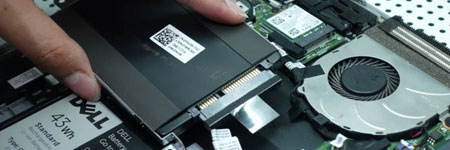
3. Locating and Replacing the RAM Module
The location of RAM modules varies across laptops:
- Some are easily accessible via a removable panel on the bottom of the laptop.
- Others are located under the keyboard (common in IBM, Dell, and Acer models).
- A few models require removing the hard drive or disassembling the casing.
Consult your laptop’s manual or manufacturer’s website for specific disassembly instructions.
4. Installation Process
- Power off your laptop and unplug it.
- Remove the battery for safety.
- Open the memory compartment panel.
- Handle the RAM module carefully to avoid static damage (use an anti-static wrist strap).
- Align the new RAM module correctly—it only fits one way.
- Insert the module into the slot at an angle, then press it down until it clicks into place.
- Reassemble your laptop and power it on.
Precautions When Replacing RAM
- Avoid static discharge – Always ground yourself before handling memory modules.
- Check voltage compatibility – Some laptop models require specific voltage ratings.
- Verify motherboard support – Not all laptops support maximum RAM capacity, so check manufacturer specifications.
- Do not force the RAM module – If it doesn’t fit easily, it’s either inserted incorrectly or the wrong type.
A Common RAM Upgrade Mistake to Avoid
A colleague once attempted to swap RAM between two laptops of the same model but different revisions without checking compatibility. The result? A fried memory module and a damaged motherboard. Always verify compatibility before upgrading or replacing RAM.
Conclusion
Upgrading or replacing your laptop’s RAM is one of the easiest ways to boost performance and extend its lifespan. With proper research and installation, you can enhance your system’s multitasking abilities, speed up application performance, and prevent frequent crashes. Always double-check your laptop’s compatibility, handle components with care, and follow best practices to ensure a smooth RAM upgrade experience.